Friday, April 25, 2014

Install Java 8 (JDK 8u5) on CentOS/RHEL 6/5 and Fedora


After a long wait, finally Java SE Development Kit 8 is available to download. JDK 8 has been released on Mar,18 2014 for general availability with the many featured enhancements. You can find all the enhancements in JDK 8 here.


This article will help you to Install JAVA 8 (JDK 8u5) or update on your system. Read instruction carefully for downloading java from Linux command line.
Step 1: Download JAVA Archive
Download latest Java SE Development Kit 8 release from its official download page.
# cd /opt/
# wget --no-cookies --no-check-certificate --header "Cookie: gpw_e24=http%3A%2F%2Fwww.oracle.com%2F; oraclelicense=accept-securebackup-cookie" "http://download.oracle.com/otn-pub/java/jdk/8u5-b13/jdk-8u5-linux-i586.tar.gz"
Note: If Above wget command doesn’t not worked for you watch this screencast to download JDK from terminal.
Now extract downloaded archive file
# tar xzf jdk-8u5-linux-i586.tar.gz
Step 2: Install JAVA using Alternatives
After extracting archive file use alternatives command to install it. alternatives command is available in chkconfig package.
# cd /opt/jdk1.8.0_05/
# alternatives --install /usr/bin/java java /opt/jdk1.8.0_05/bin/java 2
# alternatives --config java
 
 
There are 3 programs which provide 'java'.
 
  Selection    Command
-----------------------------------------------
*  1           /opt/jdk1.8.0/bin/java
 + 2           /opt/jdk1.7.0_55/bin/java
   3           /opt/jdk1.8.0_05/bin/java
 
Enter to keep the current selection[+], or type selection number: 3
 
At this point JAVA 8 has been successfully installed on your system.
Step 3: Check Version of JAVA .
Check the installed version of java using following command.
# java -version 
 
java version "1.8.0_05"
Java(TM) SE Runtime Environment (build 1.8.0_05-b13)
Java HotSpot(TM) Client VM (build 25.5-b02, mixed mode)
 
Step 4: Setup Environment Variables
Most of java based application’s uses environment variables to work. Set the java environment variables using following commands
  • Setup JAVA_HOME Variable
# export JAVA_HOME=/opt/jdk1.8.0_05
  • Setup JRE_HOME Variable
# export JRE_HOME=/opt/jdk1.8.0_05/jre
  • Setup PATH Variable
# export PATH=$PATH:/opt/jdk1.8.0_05/bin:/opt/jdk1.8.0_05/jre/bin

How to Setup MariaDB Galera Cluster 5.5 in CentOS, RHEL & Fedora


MariaDB is an relational database management system (RDBMS). Generally we use single node of database server for small application but think about application which have thousands of users keep online at a time, In that situation we need a structure which will capable to handle this load and provides high availability. So we need to add multiple database servers interconnected with each other and keep synchronized, so in case any server goes down other servers can take place of them and provide services to users.
MariaDB Galera Cluster is an synchronous Active-Active multi-master cluster of MariaDB databases. Which keeps all nodes synchronized. MariaDB Galera cluster provides synchronus replication which is always highly available (there is no data loss when one of the nodes crashes, and data replicas are always consistent). Currently it only supports XtraDB/InnoDB storage engines and available for Linux platform only.
This article will help you to setup MariaDB Galera Cluster with 3 servers running with CentOS. Cluster server details are as following.
    • Cluster DB1: 192.168.1.10 ( HostName: db1 )
    • Cluster DB2: 192.168.1.20 ( HostName: db2 )
    • Cluster DB3: 192.168.1.30 ( HostName: db3 )
Note: Step 1/2/3 has to be done on all cluster nodes and remaining steps are node specific.

Step 1: Add MariaDB Repositories

Create a mariadb repository /etc/yum.repos.d/mariadb.repo using following content in your system. Below repository will work on CentOS 6.x systems, For other system use repository generation tool and add to your system.
For CentOS 6 – 64bit
[mariadb]
name = MariaDB
baseurl = http://yum.mariadb.org/5.5/centos6-amd64
gpgkey=https://yum.mariadb.org/RPM-GPG-KEY-MariaDB
gpgcheck=1
For CentOS 6 – 32bit
[mariadb]
name = MariaDB
baseurl = http://yum.mariadb.org/5.5/centos6-x86
gpgkey=https://yum.mariadb.org/RPM-GPG-KEY-MariaDB
gpgcheck=1

Step 2: Install MariaDB and Galera

Before installing MariaDB Galera cluster packages, remove any existing MySQL or MariaDB packages installed on system. After that use following command to install on all nodes.
# yum install MariaDB-Galera-server MariaDB-client galera

Step 3: Initial MariaDB Configuration

After successfully installing packages in above steps do the some initial MariaDB configurations. Use following command and follow the instructions on all nodes of cluster. If will prompt to set root account password also.
# mysql_secure_installation
# service mysql start
After that create a user in MariaDB on all nodes, which can access database from your network in cluster.
# mysql -u root -p
 
MariaDB [(none)]> GRANT ALL PRIVILEGES ON *.* TO 'root'@'%' IDENTIFIED BY 'password' WITH GRANT OPTION;
MariaDB [(none)]> FLUSH PRIVILEGES;
MariaDB [(none)]> exit
and stop MariaDB service before starting cluster configuration
# service mysql stop

Step 4: Setup Cluster Configuration on DB1

Lets start setup MariaDB Galera cluster from DB1 server. Edit MariaDB server configuration file and add following values under [mariadb] section.
[root@db1 ~]# vim /etc/my.cnf.d/server.cnf
query_cache_size=0
binlog_format=ROW
default_storage_engine=innodb
innodb_autoinc_lock_mode=2
wsrep_provider=/usr/lib/galera/libgalera_smm.so
wsrep_cluster_address=gcomm://192.168.1.20,192.168.1.30
wsrep_cluster_name='cluster1'
wsrep_node_address='192.168.1.10'
wsrep_node_name='db1'
wsrep_sst_method=rsync
wsrep_sst_auth=root:password


Start cluster using following command.
[root@db1 ~]# /etc/init.d/mysql bootstrap
Bootstrapping the clusterStarting MySQL.... SUCCESS!
If you get any problem during startup check MariaDB error log file /var/lib/mysql/<hostname>.err

Step 5: Add DB2 in MariaDB Cluster

After successfully starting cluster on DB1. Start configuration on DB2. Edit MariaDB server configuration file and add following values under [mariadb] section. All the settings are similar to DB1 except wsrep_node_address, wsrep_cluster_address and wsrep_node_name.
[root@db2 ~]# vim /etc/my.cnf.d/server.cnf
 
query_cache_size=0
binlog_format=ROW
default_storage_engine=innodb
innodb_autoinc_lock_mode=2
wsrep_provider=/usr/lib/galera/libgalera_smm.so
wsrep_cluster_address=gcomm://192.168.1.10,192.168.1.30
wsrep_cluster_name='cluster1'
wsrep_node_address='192.168.1.20'
wsrep_node_name='db2'
wsrep_sst_method=rsync
wsrep_sst_auth=root:password
 
Start cluster using following command.
[root@db2 ~]# /etc/init.d/mysql start
Starting MySQL..... SUCCESS!

Step 6: Add DB3 in MariaDB Cluster

This server is optional, If you want only two server in cluster, you can ignore this step, but you need to remove third server ip from DB1/DB2 configuration files. To add this server make changes same as DB2.
[root@db3 ~]# vim /etc/my.cnf.d/server.cnf
query_cache_size=0
binlog_format=ROW
default_storage_engine=innodb
innodb_autoinc_lock_mode=2
wsrep_provider=/usr/lib/galera/libgalera_smm.so
wsrep_cluster_address=gcomm://192.168.1.10,192.168.1.20
wsrep_cluster_name='cluster1'
wsrep_node_address='192.168.1.30'
wsrep_node_name='db2'
wsrep_sst_method=rsync
wsrep_sst_auth=root:password
Start cluster using following command.
[root@db3 ~]# /etc/init.d/mysql start
Starting MySQL..... SUCCESS!

Step 7: Test MariaDB Galera Cluster Setup

At this stage your cluster setup has been completed and running properly. Now you can test the cluster setup by creating database and tables at any server in cluster, it will replicate immediately to all servers in cluster.


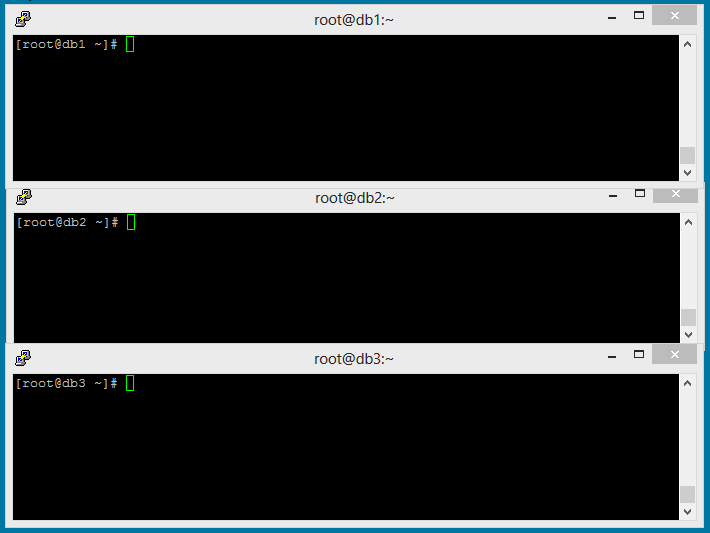
Above GIF image is showing that databases are replicating properly to all nodes of cluster.
(tecadmin)

Thursday, April 24, 2014

How to Secure SSH Connections with Port Knocking on Linux CentOS


Port Knocking is a technique used to secure connections or port access from unwanted users. Using this technique we maintain one or more previously configured ports closed and these will only be opened using a sequence of requests to a number of ports that wepreviouslyset .
To give an example , if we configure port Knocking access to port 50, this port will only be open when we make requests to the ports 1000,2500,3000 in that order , doing so, once we complete the sequence correctly the firewall will open the port that was previously closed.With this we add another level of security to certain types of connections to our server.
The client can perform the port knocking using Nmap, Telnet, or a tool for these purposes.
Let’s secure SSH connections using this method on a server running Linux CentOS . Follow the below steps as root.
Install Prerequisites
Install the libpcap library packages as requirment of Knock-server
# yum install libpcap*
Install Knock Server Package
Download and install knock-server rpm package
# wget http://li.nux.ro/download/nux/misc/el6/i386/knock-server-0.5-7.el6.nux.i686.rpm
# rpm -ivh knock-server-0.5-7.el6.nux.i686.rpm
Before setting up the Knockd daemon, we must create an iptable rule the drops all connections to the SSH port , in this case we ‘ll use the default (22).
# iptables -A INPUT -p tcp --dport 22 -j DROP
# service iptables save
[NOTE: Do not use below command it you are connected with SSH to server, It will drop your current connection]
OK ,we can now configure our knockd daemon so that out SSH port opens after a correct port knocking Sequence. Edit knockd configuration file add following values
# vi /etc/knockd.conf
[options]
        logfile = /var/log/knockd.log

[openSSH]
        sequence = 5040,6010,6500
        seq_timeout = 30
        tcpflags = syn
        Start_command = /sbin/iptables -I INPUT -s %IP% -p tcp --dport 22 -j ACCEPT

[closeSSH]
        sequence = 4040,5050,8080
        seq_timeout = 30
        command = /sbin/iptables -D INPUT -s %IP% -p tcp --dport 22 -j ACCEPT
        tcpflags = syn

Save the file and Quit (:wq!)
Finally start the Knockd service
# service knockd  start
How to Use Port Port Knowcking
Here to open the SSH port we will knock ports 5040,6010,6500 and when the sequence is completed correctly it will run a command that will add a rule in the firewall to allow the connection to our Linux Server via port 22 . We have another directive to close the port,Knocking ports 4040,5050,8080 it will run a command that will remove the Firewall rule that allowed us to do the connection via SSH.
To Knock the ports you can use the tool Nmap or Telnet as follow. For this example we use nmap.
To Open the SSH connection
# nmap -p 5040 SERVER-IP
# nmap -p 6010 SERVER-IP
# nmap –p 6500 SERVER-IP
To close the connection
# nmap -p 4040 SERVER-IP
# nmap -p 5050 SERVER-IP
# nmap -p 8080 SERVER-IP
If we see the Knockd log we will have something like this
# tail /var/log/knockd.log
 
[2014-04-10 05:20] 192.168.1.184: openSSH: Stage 1
[2014-04-10 05:21] 192.168.1.184: openSSH: Stage 2
[2014-04-10 05:21] 192.168.1.184: openSSH: Stage 3
[2014-04-10 05:21] 192.168.1.184: openSSH: OPEN SESAME
[2014-04-10 05:21] openSSH: running command: /sbin/iptables -I INPUT -s 192.168.1.184 -p tcp --dport 22 -j ACCEPT

I’m going to show a little more graphical .


This is a brief representation of the process including authentication with RSA keys.
Here we have our remote connections with a good level of security and combine with RSA authentication we hardened the connection even more. We can use this method to secure any type of connections to our Linux Server.
To read more about visit http://www.zeroflux.org/projects/knock