Now that we have Windows Server 2003 patched with SP2 and with an Antivirus, is time to do the preparation to setup active directory for our domain controller in our testing network. you can read about our previous posts here “Free antivirus for windows server 2003“ and “Installing Windows Server 2003 on a VMware server.
Before we run the dcpromo wizard, it is recommended that we setup DNS first to avoid any issue with DNS while setting up active directory. so we will install DNS now.
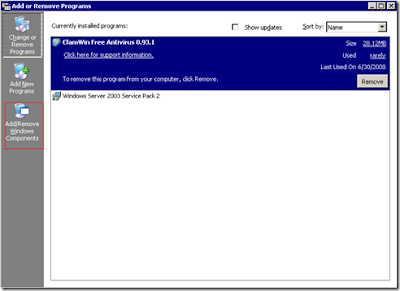
From your Windows Server 2003 desktop click on Start>Control Panel>Add or Remove Programs:

The add and remove programs window should come up. Click on Add/Remove Windows Components:
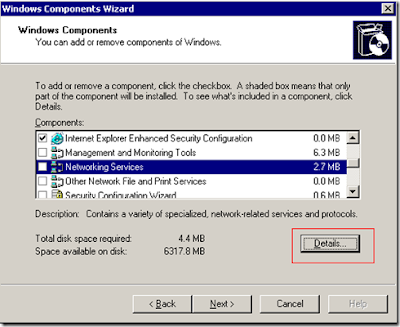
The Windows Components Wizard should come up. Scroll down, and select “Network Services” and click on Details:
Check Domain Name System (DNS) from the first option:
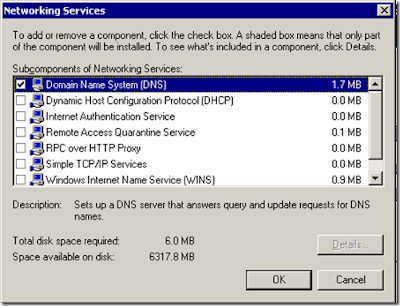
Click on OK, and then click on Next in the wizard window. The installation of DNS should start.
if your Server is setup with dynamic IP address, you will get this warning at the middle of the installation:

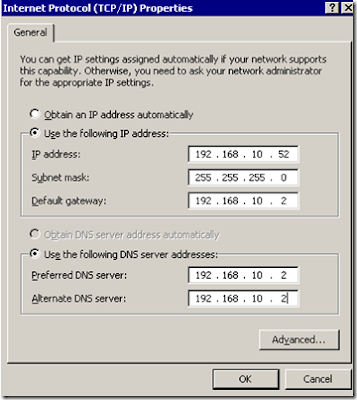
Click on the OK button. The Local Area Connection Properties window will come up to setup the static IP address.select Internet Protocol (TCP/IP) and click on properties.

The TCP/IP Properties windows will come up. type the IP address, subnet mask, default gateway, and DNS. by typing IPconfig /all on the command prompt you can get this information the server is currently using. remember you need to exclude this IP address from the DHCP server on the router:
Click on the OK button. After this, the DNS installation should finish.
Before we run the dcpromo wizard, it is recommended that we setup DNS first to avoid any issue with DNS while setting up active directory. so we will install DNS now.
From your Windows Server 2003 desktop click on Start>Control Panel>Add or Remove Programs:

The add and remove programs window should come up. Click on Add/Remove Windows Components:

The Windows Components Wizard should come up. Scroll down, and select “Network Services” and click on Details:

Check Domain Name System (DNS) from the first option:

Click on OK, and then click on Next in the wizard window. The installation of DNS should start.
if your Server is setup with dynamic IP address, you will get this warning at the middle of the installation:

Click on the OK button. The Local Area Connection Properties window will come up to setup the static IP address.select Internet Protocol (TCP/IP) and click on properties.

The TCP/IP Properties windows will come up. type the IP address, subnet mask, default gateway, and DNS. by typing IPconfig /all on the command prompt you can get this information the server is currently using. remember you need to exclude this IP address from the DHCP server on the router:

Click on the OK button. After this, the DNS installation should finish.
